zendit Product Demo

This guide will walk the user through the user management features to setup their Organization Id, invite users, transfer ownership of an account and manage users of the account. Note that only the owner of an account has access to manage users. Ownership can be transferred to another user once setup and the invite has been accepted. Once ownership has been transferred, the previous owner will lose the ability to manage team members in the account.
Organization Id is a friendly name for your organization. It is set by default when your account is created but can be customized. This is useful to allow users who are setup on multiple accounts or have their own account to navigate between accounts without having to logout and log back in.

To change your Organization Id, hit the edit button next to the organization name and an editor will pop up. You can use any alphanumeric values plus the dash (“-“) character in the name. Organization names are unique across all accounts and if you select a name that is already in use, you will need to adjust it to be a unique value. Once you are satisfied with your organization name, select the “Save” button and it will be set. You can update your organization name at any time.
This is particularly useful for organizations who have setup multiple accounts for different currency wallets so you can set a name like “IDT-Corp-USD” and “IDT-Corp-EUR” so users added to both accounts will easily be able to navigate between these accounts. If you have developers who have their own account and add them to a production account, setting the Organization Id will help them to toggle between environments and know which account they are working with in the console.
Your user profile will open and you may need to scroll to the bottom to locate the spot to change your password.
You can elect to create your own password or have zendit generate a strong password for you. Once you have made your changes, the “Save Changes” button will be available at the bottom of the profile and you will be able to click it to save your new password.
To add a team member to your account, select the “Invite User” button and the invite user pop up will appear.
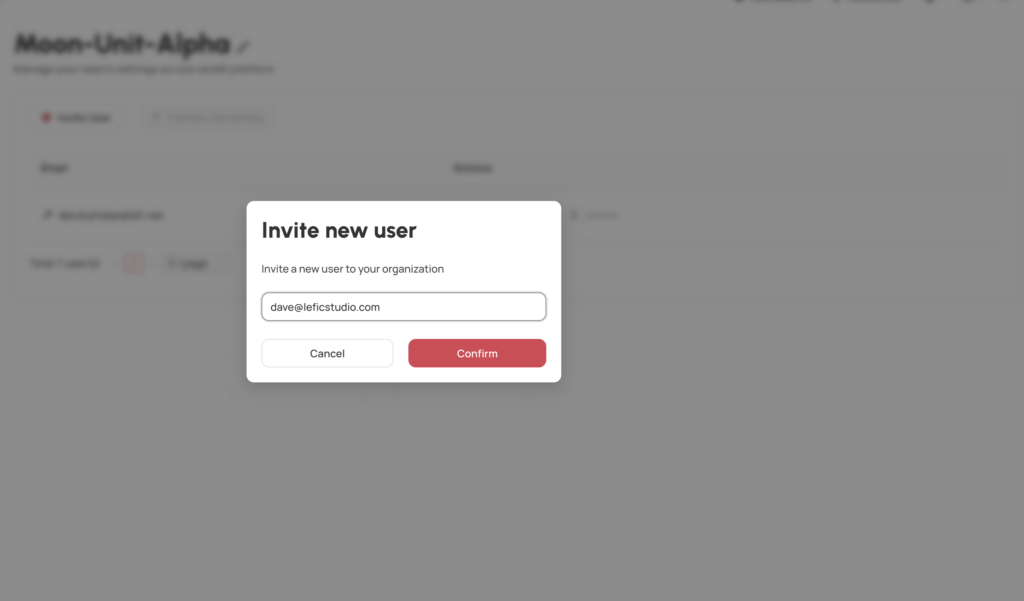
Enter the user’s email address and select Confirm. An invitation email will be sent to the user to register their user account on Zendit. After they register their account and setup their TOTP. After the user has been invited, they will appear in the list with the invite sent.
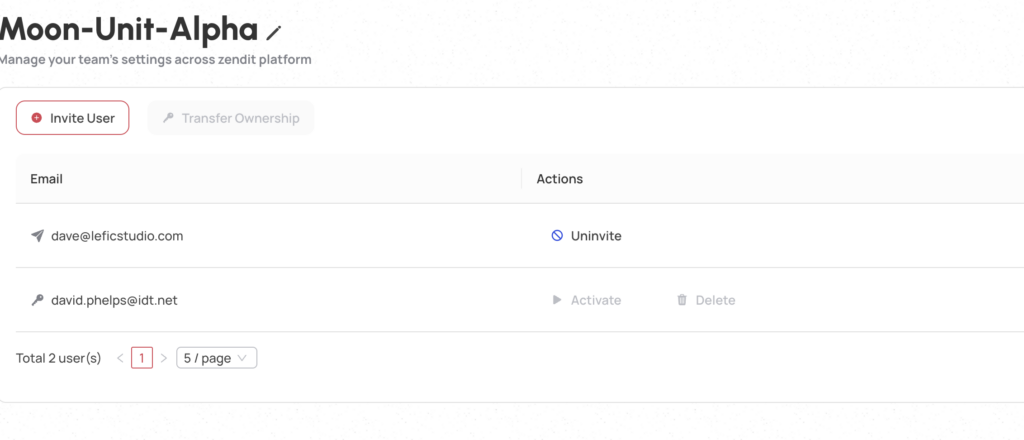
Until the user registers and accepts the invite, you can uninvite the user from the account. When the user has accepted the invite, you will have the ability to deactivate their account or delete it.
Once the invite has been accepted, the ability to manage the user will become available.
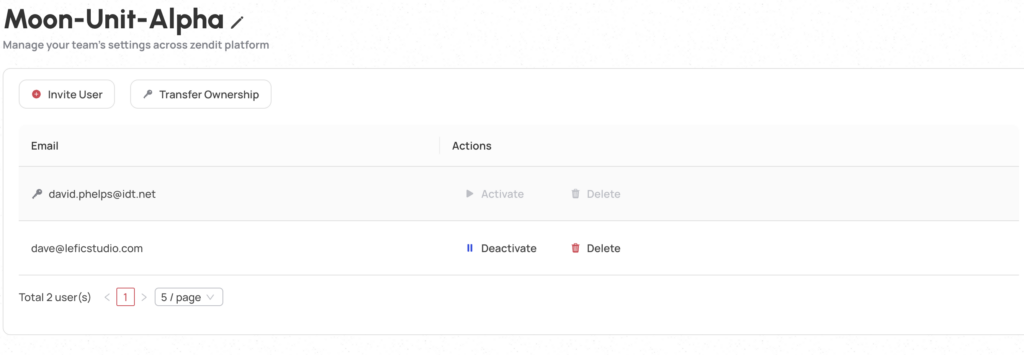
Users who have accepted their invitation are setup and active in the account. Accounts can be deactivated by selecting the “Deactivate” button and this will remove their ability to login to the account. This is available for temporarily deactivating an account without removing it.
To remove a user permanently from the account, select the “Delete” button and this will permanently remove access from the account for the user.
To transfer ownership of the account to an invited user, select the “Transfer Ownership” button. Select the user to transfer ownership to and select the “Yes” button to transfer ownership.
A confirmation message will allow you to stop or proceed with transferring ownership of the account. To complete the ownership transfer, select “Yes, Transfer” to confirm. The current owner of the account will revert to a standard user that can be managed by the new owner of the account and will lose their privileges to manage users in the account.

When a new user is invited to an account, they will receive an email informing them that they’ve been invited. To accept the invite, the user can click the link to the client console and will go through the registration process for an account.
After entering their password, they will receive an email verification message to complete their registration.
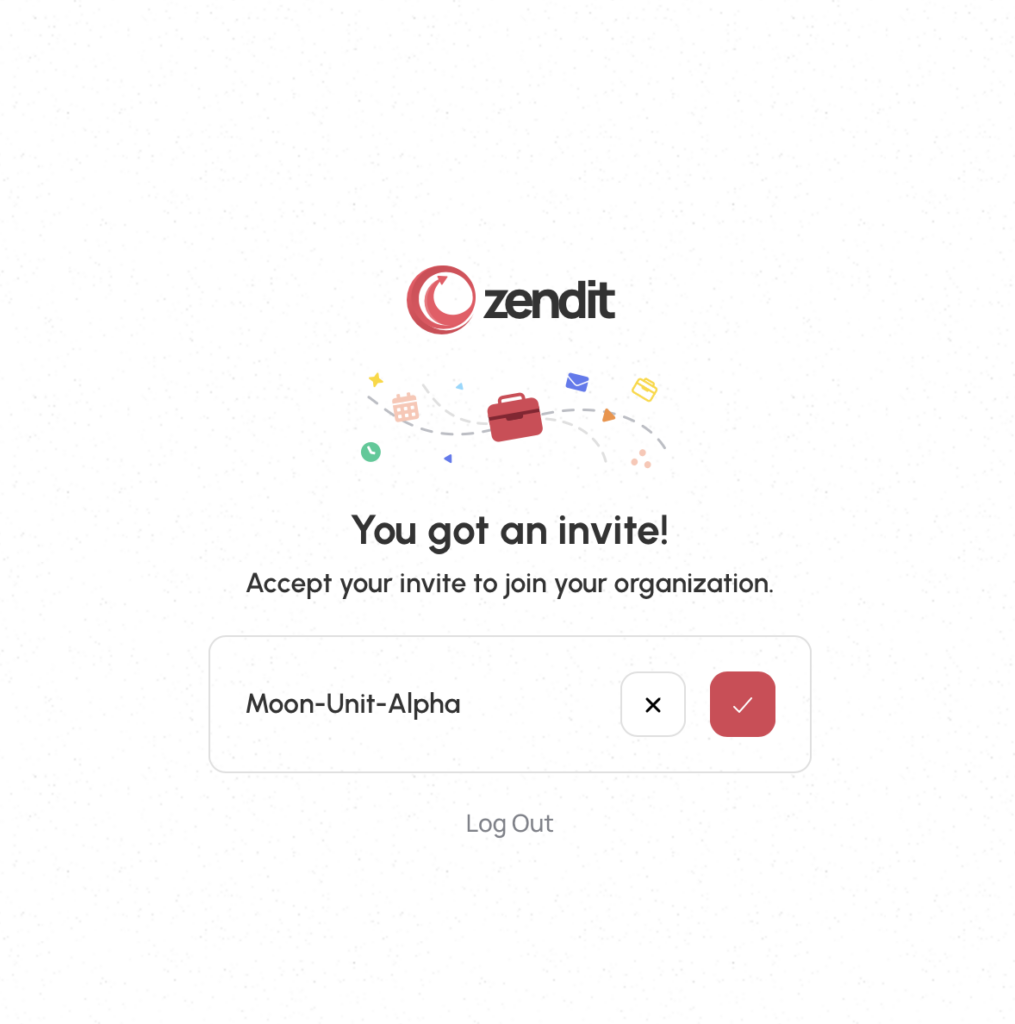
The user may accept the invite by click on the check box. To decline the invitation, they may select the decline button. Users should only accept invites from accounts that they trust.
⚠️ SMS and Email MFA will be end of life on June 30, 2024.
During the transition time, after release the first time logging into the console after the change, you will be prompted to authenticate with your current MFA and then will be guided through the process to setup TOTP authentication. You will not be able to login to the user console without setting up TOTP.
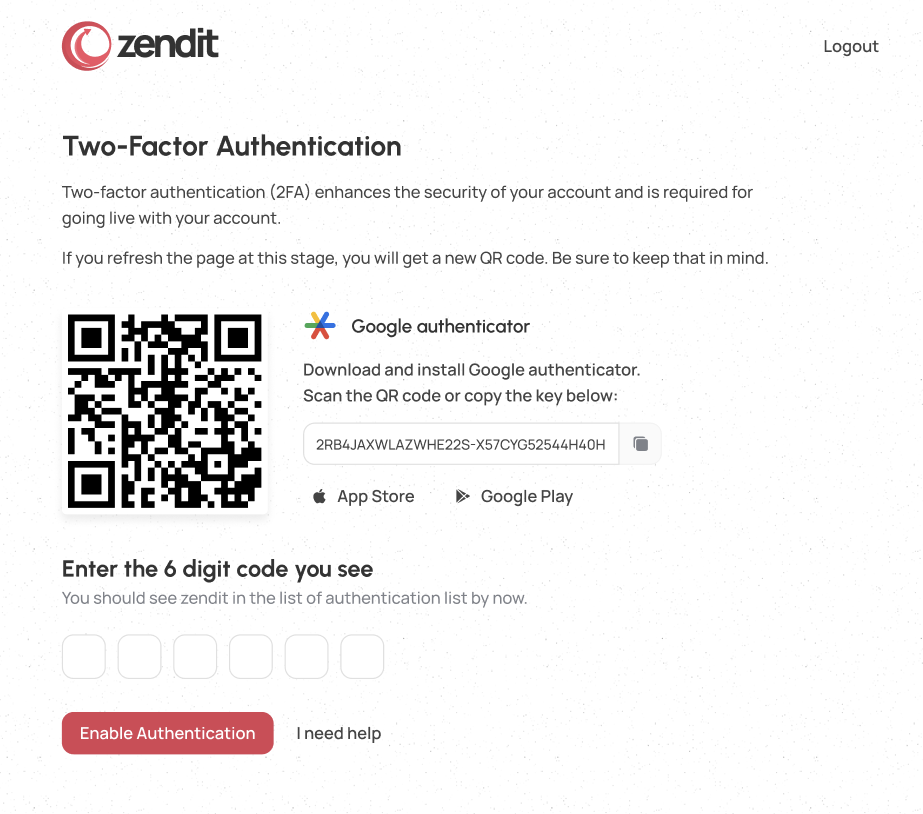
For TOTP, zendit recommends using Google Authenticator that can be downloaded to your mobile device for iOS (https://apps.apple.com/us/app/google-authenticator/id388497605) or Android (https://play.google.com/store/apps/details?id=com.google.android.apps.authenticator2)
Once installed on your device, you can simply scan the QR Code in Authenticator and it will add zendit to your list of MFA accounts.
Enter the 6 digit code from the Authenticator app for your account and once you submit, you’ll be logged in. Each time you login to the console, you’ll be prompted for the 6 digit code from the Authenticator app. No more missed SMS messages because your cellular signal is problematic or traveling in a region where you don’t have roaming. Speaking of roaming, have you checked out our eSIM products yet?
With Google Authenticator, you can use an existing Google Email or GSuite account to back up your TOTP code to the cloud and if you ever lose your device, or upgrade your device, you can simply install Google Authenticator on the new device and log in with your Google account to download the TOTP code to your new device.
Google Authenticator is one of numerous TOTP apps for managing MFA codes and while you may choose another app based on your preference, Zendit will only provide support with the Google Authenticator.
Sharing your account with someone else while waiting for us to roll out multiuser accounts? No problem, simply take a screenshot of your QR code and you can share it with other users to scan with Google Authenticator on their device and have quick access to the MFA codes.
Just remember who you shared it with so you aren’t distributing it to untrusted users in your organization!
Users with an existing account wiil login as usual with their current credentials and TOTP code and will be able to accept the invite and then select between accounts they wish to view.
Read more

Wallets in zendit serve as storage for funds used to purchase offers.

The zendit catalog consists of several sections that offer a variety of products for different purposes.

Get alerts to stay informed about upcoming promotions, catalog updates, security updates to a client environment, system outages and webhook failures.

Setting up your dashboard with how you want to view your data is easy with zendit learn how to customize it.

zendit supports 2 types of widgets: Transaction & Product Widgets and System Performance Widgets.

zendit supplies a sales report that provides summary level details and a transaction listing for the date period provided.
We’re here to help, please either use our contact us form or send us an email.
Contact Us Send us an email